- Jun 14, 2021
Easy Steps to Create a Starburst Photography Effect Day or Night
- courtneyslazinik
- 0 comments
The sun rays are such a powerful and beautiful thing to capture. They show up through a lens way better and safer than our own eyes. Capturing starburst photography is a fun way to photograph those rays. This is not just created using the sun but any kind of light! I promise it is easier than it looks and you can do it, let me show you how!
Table to Contents
What is a starburst effect in photography?
The starburst photography effect is when you are able to capture the individual light rays in a shot. It usually end up looking like a star, hence the name. This can be done using the sun or any kind of light. This is technically a light diffraction. Or a bend in the light source.
Many landscape photographers use this handy skill to enhance their photos. It can take a normally dull photo and elevate it and bring in more detail. It’s just another way to showcase how beautiful our world is!

Read more: Elevate Landscape Photography with Light
What are the starburst photography settings?
Set your aperture as high as it can go
I would recommend starting at f16. This will allow you to really get a large starburst. The higher the number, the bigger the starburst and more rays you will catch.
You can get the effect if your f-stop is open wider it just doesn’t have the same big starburst lines.
Recommended setting with a tripod
Slow down your shutter speed
To create the starburst effect, your camera needs to be able to pick up the light source. So after you set your aperture, go to shutter speed and adjust accordingly. This will get you a big and tack sharp sunburst.
Read more: How to take Unique Photos that WOW Using Slow Shutter Speed
Keep your ISO low
You may be working with low light when trying to capture starburst photography. To minimize the noise in your photo, try to properly expose without adding too much ISO. Unless your camera is capable of working in low light and using ISO without the grain then go ahead!
Recommended setting without a tripod
If you don’t have a tripod, you can definitely still capture the starburst effect.
Shutter speed
Without a tripod you are going to want to keep you shutter speed no faster than 1/125. First try to steady your hand and body on something stable to help avoid camera shake.
Raise your ISO
Since your shutter speed is going to have to be faster to avoid any blur from your hands, you are going to have to compensate for that light using your ISO. Also your aperture being so high, you will need the help from ISO to properly expose your photo.
How to make a starburst in a photograph
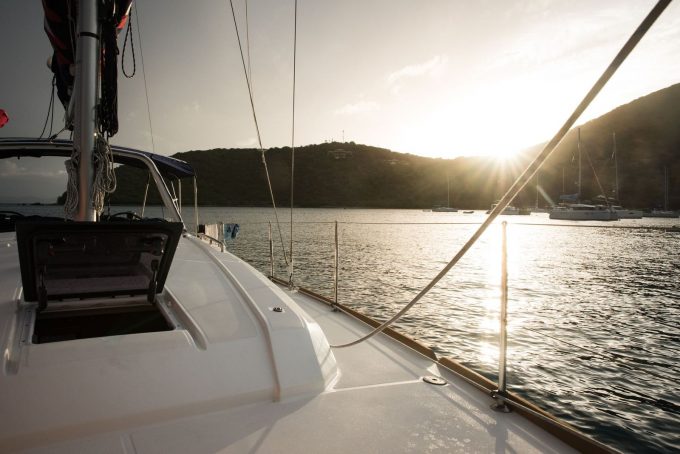
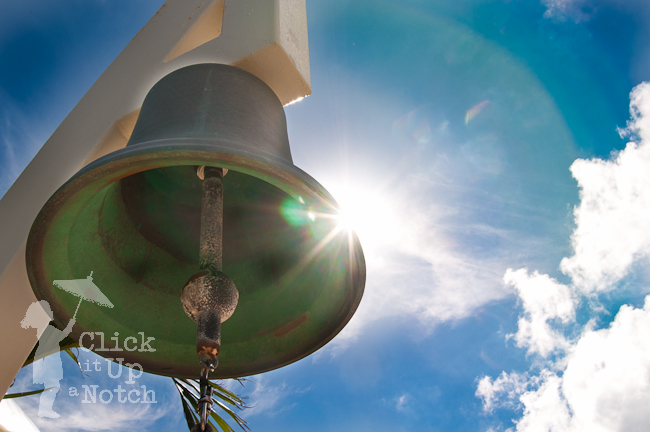
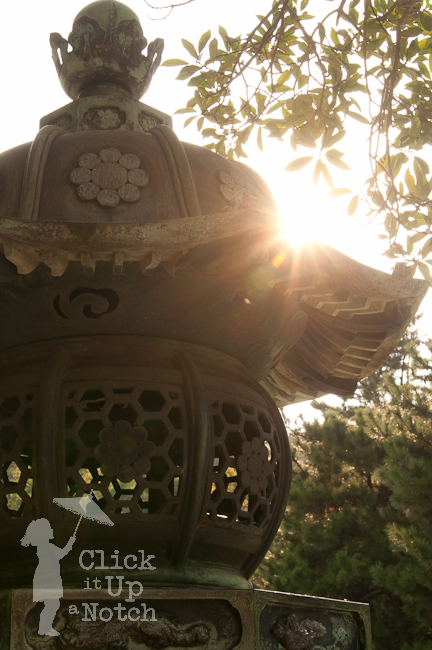
Partially block the sun with another object.
If you are shooting during the day you are most likely going to be using the sun to create the starburst effect. To be able to get the rays, you will need to find something to partially block the sun. Look for a fence, a tree, or a person. Anything will work just place the sun behind the subject just a little bit.
Read more: 7 Creative Ways to Use Outdoor Light
ISO 160, f18, ss 1/160
Cover your lens with your hand
Use your hand to shield the light (like you shield your eyes from the sun) that is pouring into your lens. Set your focus on the object or the foreground.
Then adjust your settings. Once you have your settings set then you can move your hand and let the light pour in. Don’t worry if your light meter goes a little crazy once you move your hand, just take your shot and watch the starburst effect appear!
ISO 320, f14, ss 1/80
Read more: Everything You Need to Know for Unique Lens Flare Photos
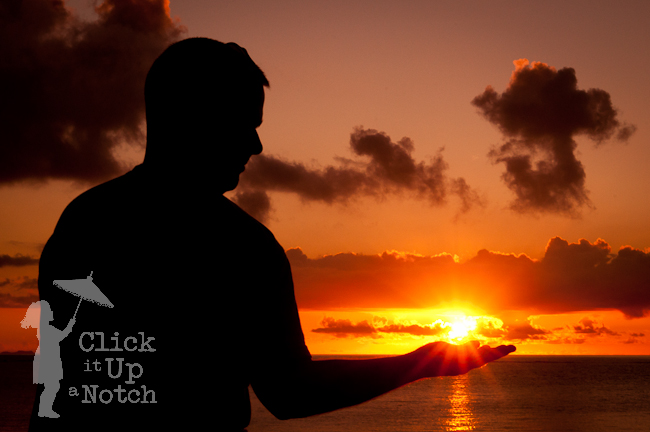
Don’t point your camera directly at the sun
Yes we need to place the sun behind the subject, but make sure not to point your lens directly at the sun. This could cause damage to your lens and to your eye. Use the tip above and place another object in front of the light, this will allow you to protect your gear and eyes.
Read more: Master Backlighting Photography in 8 Simple Steps
ISO 500, f32, ss 1/100
Use a tripod for starburst photography
If shooting at night be sure to use a tripod since your shutter speed will be slower in order to get your photo properly exposed. Or if you are like me and take your tripod to Tokyo Disneyland only to be told you aren’t allowed to use it, you can set your bag on some bushes as a make shift tripod.
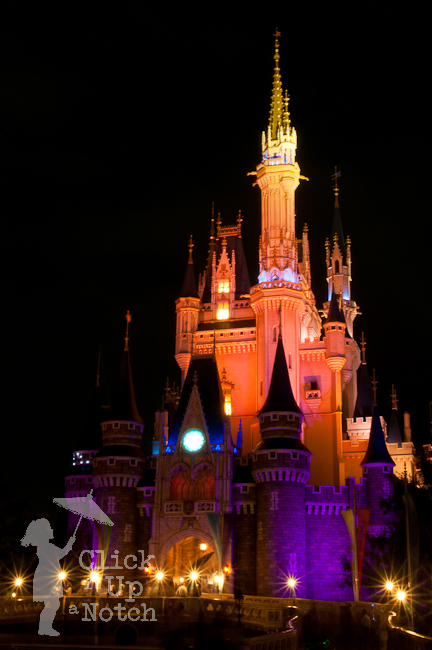
ISO 250, f32, ss 25.0
Read more: 5 Must Try Backlighting Techniques
Experiment with starburst photography
One of the best ways to really learn this style is to practice. Pick a time day or night and focus on that for a week. Look for different subjects to block the light during the day. At night try to recreate an ambiance at your favorite outdoor restaurant or backyard patio.
Read more: 5 Reasons to Embrace Low Light Photography

ISO 320, f22, ss 0.5
One thing you could do is set up your tripod on one subject and take the same exact shot but adjust your f/ number to see how it changes the starburst.
Read more about fun ways to use light:
– How to Master Low light Photography
– Secret to backlighting
– Finding light in unexpected places
The post Easy Steps to Create a Starburst Photography Effect Day or Night appeared first on Click it Up a Notch®.