When I began learning about photography, portraiture was just about the only type of photography on the brain. I wanted to take better pictures of my kids, so when I learned about metering, I learned to meter off of skin because in portraiture getting the correct exposure for skin is the most important. But, when taking photographs of landscapes and macro, there isn’t skin to meter from. So, how do you go about metering when you typically don’t meter off of a gray card or skin?
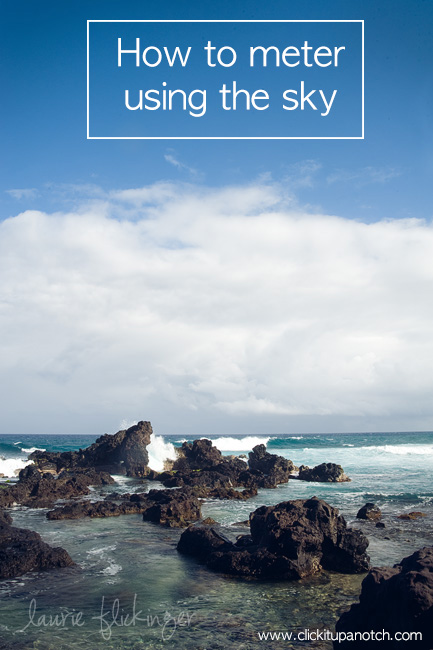
Meter Using the Sky
Recently, my husband and I took a vacation to Maui, Hawaii where I took a BUNCH of pictures, and very few of them had people in them. I’m not typically a landscape shooter, but in Hawaii, there are way too many beautiful scenes not to attempt it. I found myself having to meter using the sky a lot of the time, especially on the really sunny days.
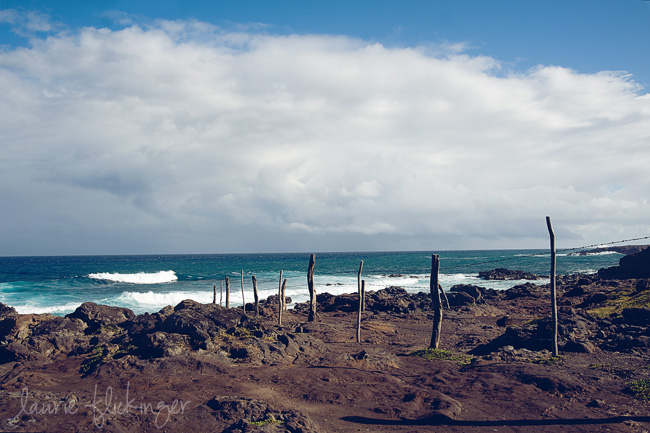
Bright Blue Sky
In full sun, the deep bright blue sky is a great place to meter for a jumping off point. When using the Zone System, the bright blue sky is considered the same tone as neutral gray. For example, pretend you were seeing the sky in B&W, the blue of the sky would be neutral gray if converted. So, I would meter the sky, set it to zero, take a test picture and look my histogram. Check out Reading a Histogram by Courtney to learn more about how to read a histogram. Learning to trust your histogram is essential to getting good exposure every time. After taking a peek at the histogram, I then decided whether or not to underexpose or overexpose the image or leave the meter at zero.
Here is an example of what I think of as a “bright blue sky” and of which I started off with metering at zero, and then made minor adjustments after taking a look at the histogram. Training your eye to see “neutral gray” in colors will give you a great place to start when metering off of subjects that don’t have skin. There is some lens vignetting in this image, which I liked and didn’t correct in ACR, but the center of the image is closer to what the eye saw on that day.

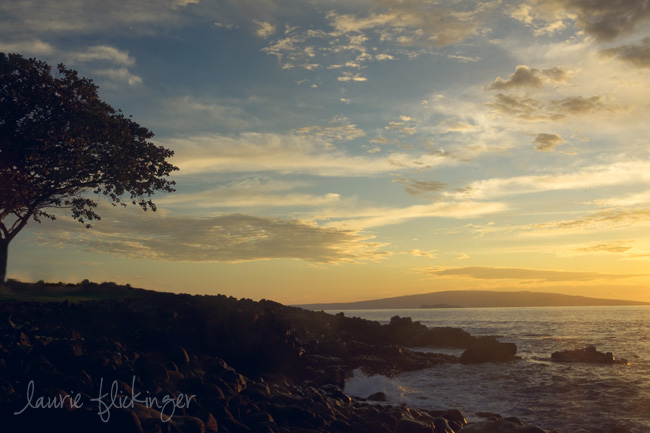
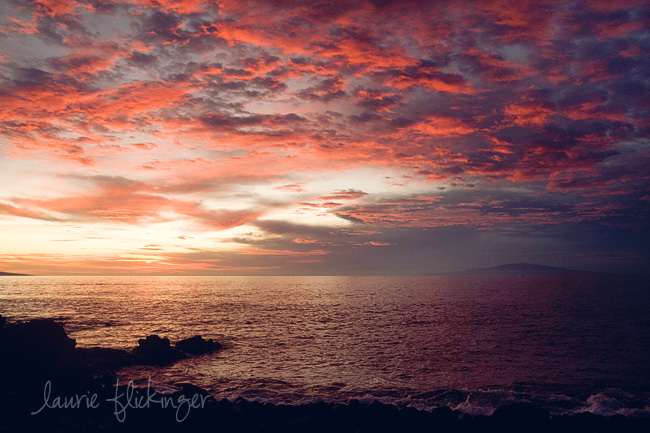
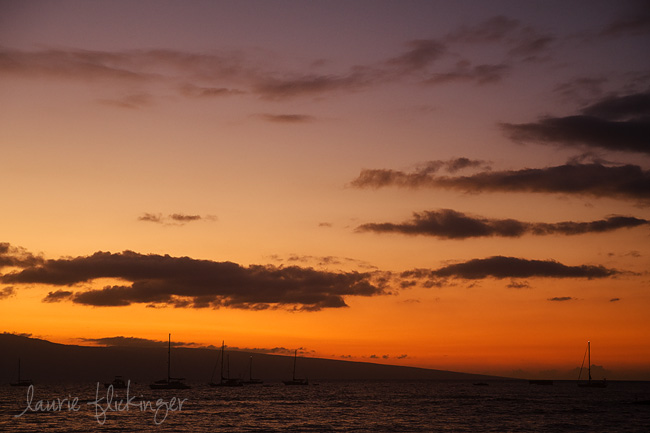
Sunsets
You can also use the sky to meter for sunsets. In the following images, there is a bit of blue sky (much to the left of the sunset), clouds, dark waters, a lot of light reflecting off of the water. Again, I metered off of the blue sky, then adjusted accordingly by taking a look at my meter and LCD. By checking the histogram, I could be sure that was I thought was most important in the image was exposed correctly. For me, I wanted the yellows to pop the most. I slightly underexposed to allow the colors to be more saturated, then brightened as I wished in post processing. As the sun was closer to setting, I was constantly changing my settings. But, since I already had a good measurement, I knew that I only needed to keep overexposing by 1/3 of a stop or so every few minutes.
One more example!
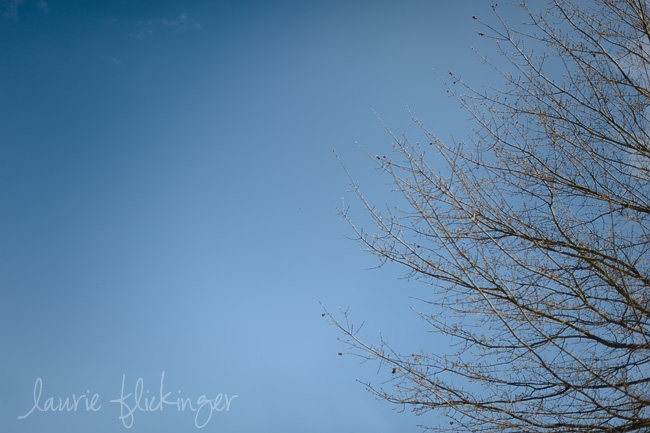
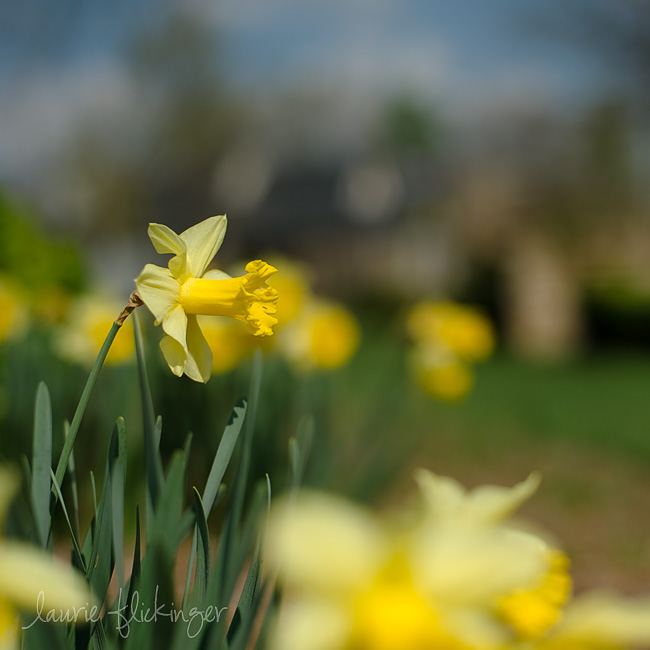
Here are a couple of pictures that I took just for this post to further demonstrate what I mean by metering off of the sky. This is not the lighting I would choose for this pretty daffodil, but for the purpose of this post, it works. I pretty much always spot meter. I’m usually taking pictures of my kids so spot metering works for me. Because I know it better than the other modes, I use it almost exclusively. So, for these images, I spot metered the big blue sky, then set my meter to zero and took the picture of the tree. For the tree, the exposure looks pretty good. Next up, I thought I would take a picture of this daffodil to show how I would adjust my meter. It is located about 15 feet from this tree at the same angle from the sun and sky from which I metered originally. I took the picture of the daffodil, then took a quick look at the histogram. I could tell that the yellow was blown because the histogram was climbing the wall a bit and the lightest color in the image is the yellow. I readjusted the meter to underexpose by 2/3 of a stop (two ticks to the right for Nikon and 2 ticks to the left for Canon users). And bingo, the histogram moved in the direction that I wanted and exposure is right where I want it.
I hope this gives an idea that there are many different ways to meter depending on your subject. I’ll be writing another post at some point this year about the “Zone System” and how helpful it can be when metering for landscapes. Thanks for reading!


Thanks Laurie! I found this to be very helpful! I am hoping for blue skies so I can try it out :)
Super super helpful. I “get” metering but it’s always helpful to read tutorials like this. Lots of good info here. I’m going to Hawaii this summer and this will come in handy I’m sure. I’m Pinning this for future reference :) Thank you Laurie and Courtney!
Hi There great article but what do you mean by “set it to 0”?
Thanks.
When shooting in manual mode, and setting exposure, you look into the camera and set the meter inside to “0” by adjusting the shutter speed, aperture, or ISO. I start ISO, then aperture, and finish with setting the shutter speed most of the time. I hope that clears it up. I shoot Nikon, so I’m assuming it looks the same for Canon users too.
Thanks! I will have to try this today. Great info, beautiful pictures!
This was so helpful and timely! I was trying to take some “Spring” pics yesterday of the flowers and trees in our yard and was like “huh – i really have no idea how to meter effectively without a person in the pic.” Thanks for the awesome tutorial!
THanks yes sorry that makes total sense now – Cheers. Sharron
Oh wow wow wow. This post just goes to show how much I need to learn. I don’t know how to meter off anything and that’s why I don’t like to take photos in full sun. They are awful and I dream of taking clear beautiful shots like these. Only then will I be fully happy as a photographer!
Thank you so much
WOW… wonderful tutorials on this post. The 50MM and the 104 macro lens are amazing Just gotta be able to afford a few more now! ;-)
This post would be lovely linked up to my Sunday School Linky Party today… maybe you would consider. perfect.
Jennie. x
Hi!! I love your blog. A friend of mine told me about it and I am so glad she did. I have a questions. I am new to shooting in manual. When you talk about stops what does that mean? Are you referring to the meter chart? I have a Nikon D5000. How much does each one of those lines on the meter represent? 1 stop?
thanks
Your series of photography info is the best I have seen so far. You keep it simple with lots of images to show the differences in the different types of settings. These have really helped me become a better photographer. Keep the tips and info coming! Thanks!
“By checking the histogram, I could be sure that was I thought was most important in the image was exposed correctly. For me, I wanted the yellows to pop the most. I slightly underexposed to allow the colors to be more saturated, then brightened as I wished in post processing. As the sun was closer to setting, I was constantly changing my settings. But, since I already had a good measurement, I knew that I only needed to keep overexposing by 1/3 of a stop or so every few minutes.” -I am confused by this. Your saying you underexposed to get the colors more saturated, but why would you overexpose as the sun wheat down?
Because the light is fading :)
Thank you for the article, I’ve been trying my hand at Blue Sky Metering so your article was good reinforcement and explained it well. Since I’m also trying to learn and study my histogram, I would have loved to see what your histogram looked like to get a better understanding of what I should be looking for. I’m one of those people that needs to see the whole process (lol). I just love this website and all the knowledge that is shared.
ooops, now I see the link to Courtney’s article on Histogram which shows the photo and the histogram…. thanks so much for the reference. All you ‘contributors’ just rock!
great tips! thank you for the advices… I love landscape photography :)
Wow! After looking at the above shots, I think I should try some landscape photography too. Sky gives us a lot to feed upon.
When you say “move two ticks,” what are the “ticks?”
The link to metering off skin tone is broken :(
Thank you. Enjoyed this!